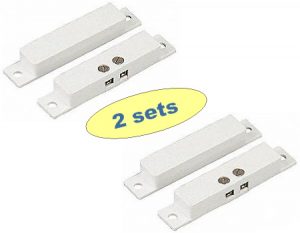
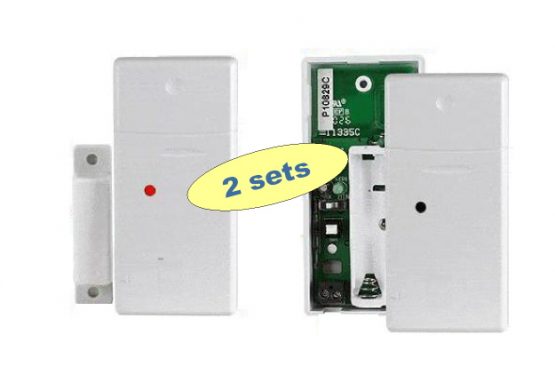
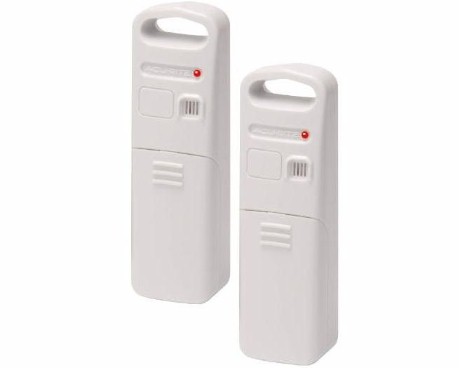
The Wireless Range Extender Package provides enhanced signal coverage for wireless devices including compatible door/window sensors. Ideal for increased coverage or for combating interference issues, the system is easily installed, requiring minimal time and effort. The following items are included:

  • KD-SR751 RF Repeater
  • KD-HSRS-RF-ANT-KIT coax cable with antenna, plus mounting bracket

Notes:

  • The range extender is intended for use with Class 2 (X10) sensors only. (Class 1 sensors are not compatible.) Extender is perfectly suited for use with the HVAC Smart Relay Switch.
  • The antenna kit (KD-HSRS-RF-ANT-KIT) is to be applied at the HSRS or GPRS controller/receiver, replacing the original antenna.
  • RF range results can vary widely for every installation. In general, wireless signals can be diminished or impeded by RF interference, concrete walls, metal doors, large appliances, etc. If necessary, experiment with different locations for applying RF repeater unit(s).
  • Discounts for quantity purchases (computed automatically at checkout). Buy today and get free shipping on your order – no minimum purchase! (*Any U.S. destination, excluding AK & HI.)

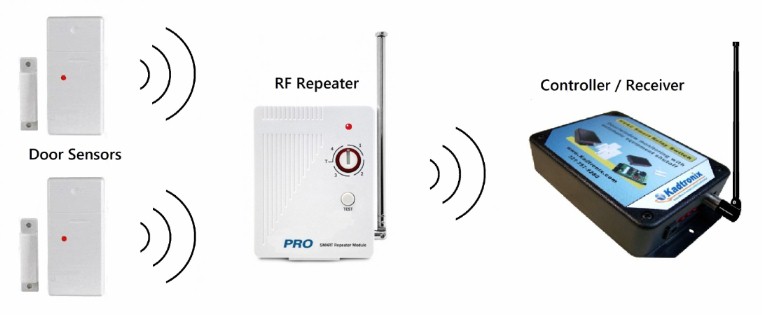
Wireless Repeater System – Typical Network

Features:

 
  • Compact & easy to install – requires no tools or complicated setup
  • Max range: 100 ft. (open air) / 50 ft. typical
  • LED activity indicator
  • Expandable (up to 4 repeaters)
  • No batteries required
  • Plugs into any standard AC wall outlet
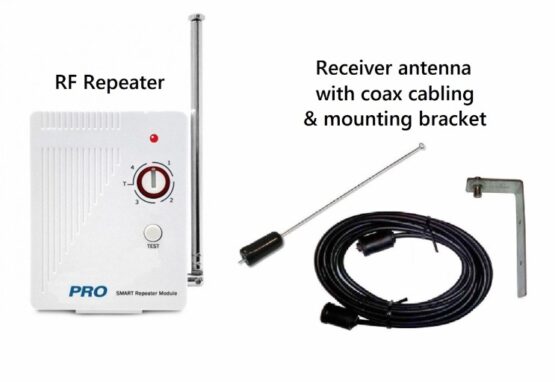
 

What’s Included:

 
  • KD-SR751 repeater
  • KD-HSRS-RF-ANT-KIT antenna kit (for HSRS receiver / controller)
 

User Manual:


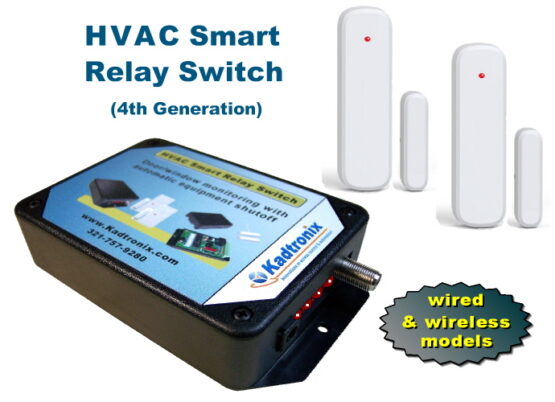
HVAC Smart Relay Switch (HSRS):

 
Weight 3 lbs
Repeater quantity

1, 2 (+$89), 3 (+$178)

Reviews

There are no reviews yet.

Be the first to review “Wireless Range Extender (Class 2, X10)”

Any tips for completing a proper install?

Installation is straightforward and requires no special skills other than your existing expertise with HVAC systems and basic wiring. Consider the following tips for a smooth, trouble-free installation:

Tip #1: When installing the HSRS wireless system, be careful to avoid contacting the antenna to any grounded surface such as the HVAC equipment chassis. For best RF reception, locate the antenna as high as possible (i.e., just below the ceiling). Also, ensure a minimum separation of 3 feet from any of the following:

  •   - Wireless devices (wi-fi routers, cordless phones, etc.)
  •   - Metal equipment (HVAC, laundry appliances, water heater, metal shelving, etc.)
  •  

Tip #2: If GEN3 wireless sensors are to be applied to metal doors, windows, patio doors, or other metal framed opening, you'll want to be prepared to make adjustments to combat possible metal-induced interference. (Applies primarily to GEN3 sensors. GEN2 door sensors are better equipped to overcome interference issues.)

If installing a GEN3 wireless sensor to a metal surface, apply masking tape to temporarily mount the sensor until confirming proper & consistent signalling with the controller/receiver. Consult the following resource for details:

Tip #3: When installing a wireless door/window sensor, consider the following:

  • - The mini sensor requires no setup other than inserting a CR2032 battery (included)
  • - The basic sensor contains two wiring screw terminals which must be wired together with a short jumper. Apply the jumper prior to inserting the battery. (The jumper can be omitted if you plan to apply a wired door switch at these wiring terminals.)
  • - The classic sensor must be properly initialized after inserting batteries. To do this, press & hold the white push-button for 5 seconds.
  •  

Tip #4: Before permanently mounting wireless door/window sensors, first complete the registration (i.e., pairing) procedure, keeping the sensors close at hand for convenience. Following registration, test to ensure the controller unit recognizes door sensor activity. Once you are satisfied the system is behaving properly, apply the sensors as desired.


Is it safe for my A/C compressor?

Absolutely. First, consider that modern HVAC systems are equipped with built-in delay mechanisms to ensure that refrigerant pressures have equalized before allowing the compressor to start. Second, our HSRS controller features its own configurable delays, described below:

Delay #1 minimizes the possibility of short-cycling by preventing shut-off unless the monitored door or window remains open for a preset time period. Configurable from 0 to 600 minutes (10 hours), the typical setting for most installations is 2 minutes. Therefore, a door must remain open continuously for 2 minutes before shut-off is invoked.

Delay #2 is a configurable re-activation timer that prevents the HVAC system from restarting until the desired time elapse. As mentioned earlier, most HVAC systems provide their own built-in delay for this purpose, so a secondary delay is typically not required. Still, we find that some customers prefer to deploy it for added peace of mind.